手机GSM 2G网络嗅探设备组装之短信嗅探教程
资源外星人导读:本站为大家带来手机GSM 2G网络嗅探设备组装之短信嗅探教程文章,更多精品资源,请继续关注资源外星人!
我用的是ubuntu12.04-i386(其实kali也可以)
一:更新系统

右上角进入软件更新,修改更新源(当然也可以命令修改vi/etc/apt/sources.list)
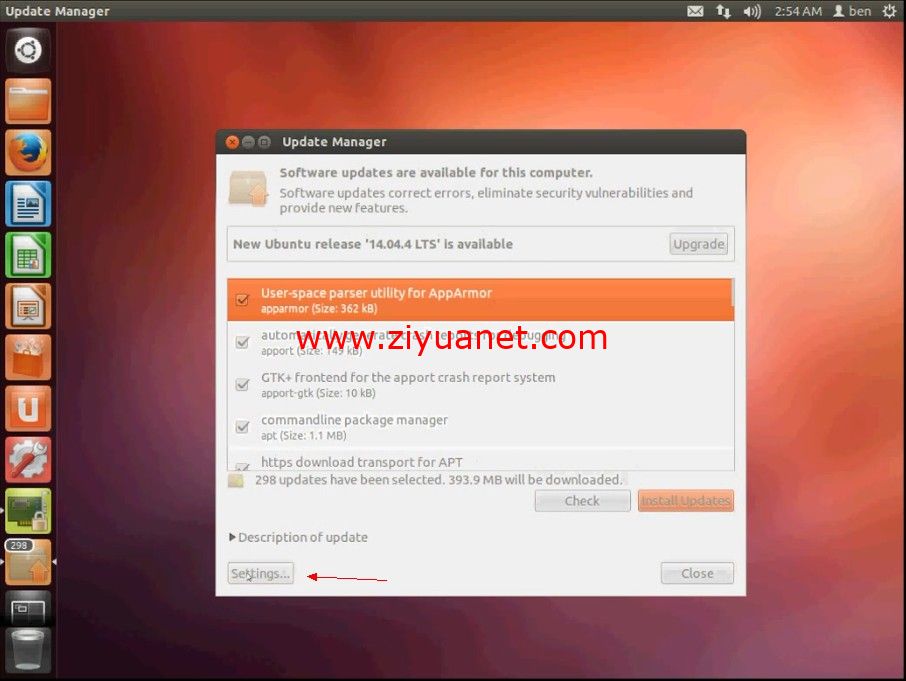
点击settings
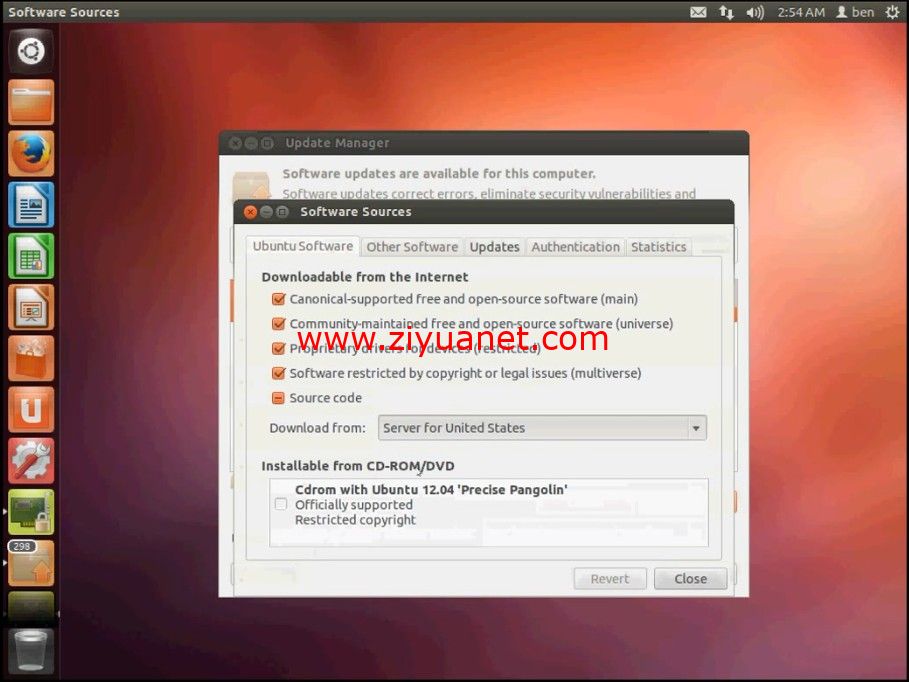
software里面找到download from 修改自己国家的更新源
然后保存退出即可
现在打开终端
$ sudo apt-get update
$ sudo apt-get upgrade
二:接着安装一系列依赖
$ sudo apt-get install libusb-0.1-4 libpcsclite1 libccid pcscd
$ sudo apt-get install libtool shtool autoconf git-core pkg-config make gcc build-essential libgmp3-dev libmpfr-dev libx11-6 libx11-dev texinfo flex bison libncurses5 libncurses5-dbg libncurses5-dev libncursesw5 libncursesw5-dbg libncursesw5-dev zlibc zlib1g-dev libmpfr4 libmpc-dev libpcsclite-dev
(不要嫌多。。直接复制)
三:创建几个目录,下载ARM编译器
$ mkdir osmocombb
$ cd osmocombb
$ mkdir build install src
$ wget http://bb.osmocom.org/trac/raw-attachment/wiki/GnuArmToolchain/gnu-arm-build.3.sh
$ cd src
$ wget http://ftp.gnu.org/gnu/gcc/gcc-4.8.2/gcc-4.8.2.tar.bz2
$ wget http://ftp.gnu.org/gnu/binutils/binutils-2.21.1a.tar.bz2
$ wget ftp://sources.redhat.com/pub/newlib/newlib-1.19.0.tar.gz
四:安装gnu-arm-build.3.sh
$ cd ..
$ chmod +x gnu-arm-build.3.sh
$ ./gnu-arm-build.3.sh
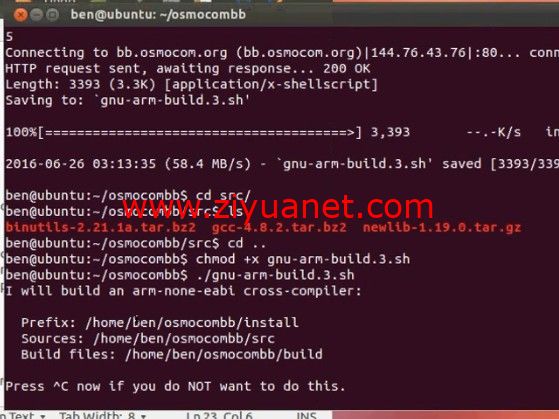
看到这里直接回车即可(过程非常漫长,建议可以看个电影先。。)
五:安装完过后添加环境
$ cdinstall/bin
$ pwd
(查看路径)
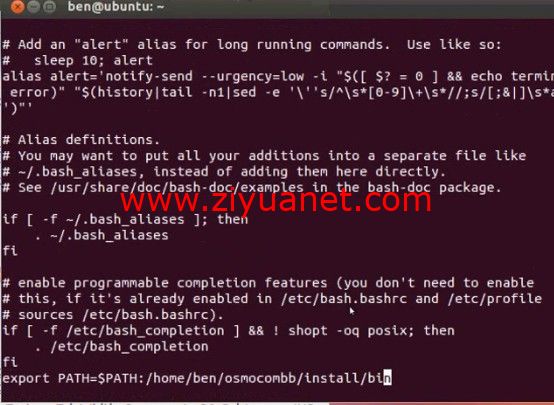
$ vi ~/./.bashrc
export PATH=$PATH:/osmocombb/install/bin (最后一行加入,保存退出)
$ source ~/.bashrc
六:下载并编译osmocomBB
回到osmocombb目录下载osmocom
$ git clone git://git.osmocom.org/libosmocore.git
$ git clone git://git.osmocom.org/osmocom-bb.git
在安装libosmocore执行./configure 的时候很多人会遇到No package 'talloc' found 这种错误,因为找不到talloc,下面是解决办法
$ wgethttps://www.samba.org/ftp/talloc/talloc-2.1.7.tar.gz
$ tar -zxvf talloc-2.1.7.tar.gz
$ cd talloc-2.1.7/
$ ./configure
$ make
$ sudo make install
安装libosmocore
$ cd libosmocore/
$ autoreconf -i
$ ./configure
$ make
$ sudo make install $ cd ..
编译osmocombb
$ cdosmocom-bb
$ git checkout --track origin/luca/gsmmap
$ cd src
$ make
七:修改问题文件(如果你是gnu-arm-build.2.sh并且没有出现cell扫描不动的问题,请跳过这一步)
进入osmocom-bb找到这些文件并修改他们
viosmocom-bb/src/target/firmware/board/compal/highram.lds
viosmocom-bb/src/target/firmware/board/compal/ram.lds
viosmocom-bb/src/target/firmware/board/compal_e88/flash.lds
viosmocom-bb/src/target/firmware/board/compal_e88/loader.lds
viosmocom-bb/src/target/firmware/board/mediatek/ram.lds
找到里面的这一串代码
KEEP(*(SORT(.ctors)))
在下面加入
KEEP(*(SORT(.init_array)))
列如:
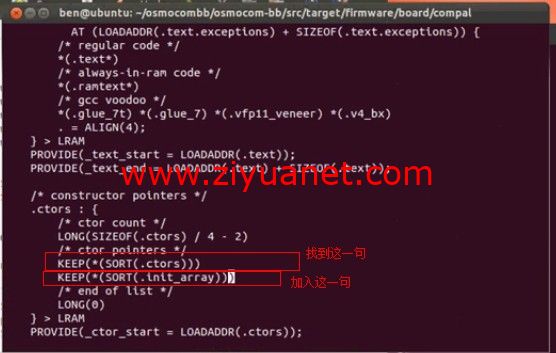
保存即可,全部修改好,在进入osmocom-bb/src重新编译一下
$ make -e CROSS_TOOL_PREFIX=arm-none-eabi-
八:插~入你的118刷入固件
还是在osmocom-bb目录
$ cd src/host/osmocon
$ sudo ./osmocon -m c123xor -p /dev/ttyUSB0 ../../target/firmware/board/compal_e88/layer1.compalram.bin
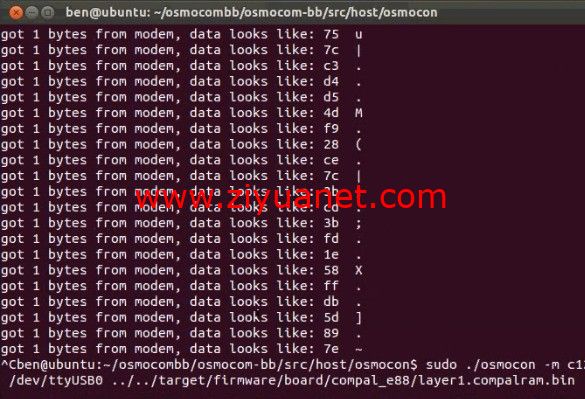
回车出现这样等待的时候按一下你c118的开机键,按一下就可以
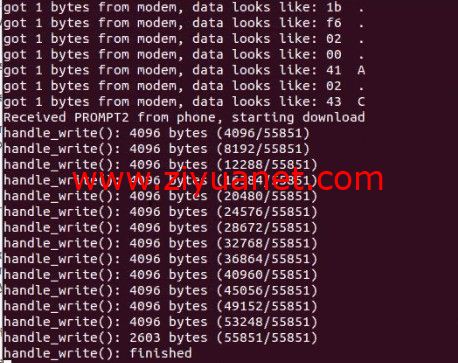
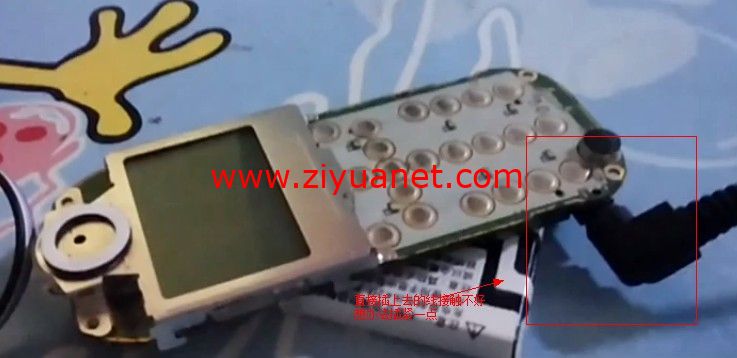
如果这样是刷入失败,看一下你的c118连接线,如果你是买的新手机建议把线插紧一点。。最好把壳拆下来
九:扫描基站信息
打开新的终端还是在osmocom-bb目录
$ cd src/host/layer23/src/misc
$ sudo ./cell_log -O
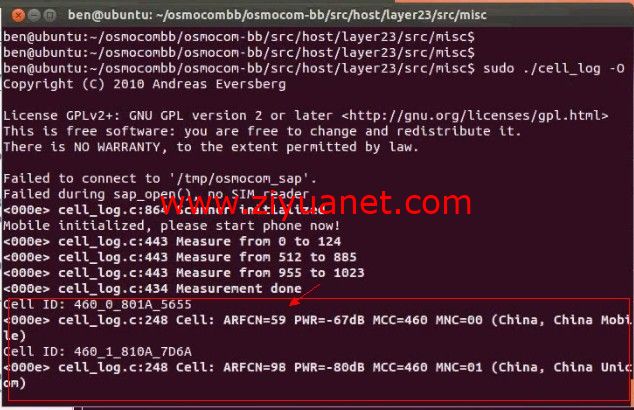
接着输入
$ sudo ./ccch_scan -i 127.0.0.1 -a ARFCN
ARFCN就是上面图圈出来的那个值,列如
$ sudo ./ccch_scan -i 127.0.0.1 -a 59
十:安装wireshark
打开新的终端
$ sudo apt-get install wireshark
$ sudo wireshark -k -i lo -f 'port 4729'
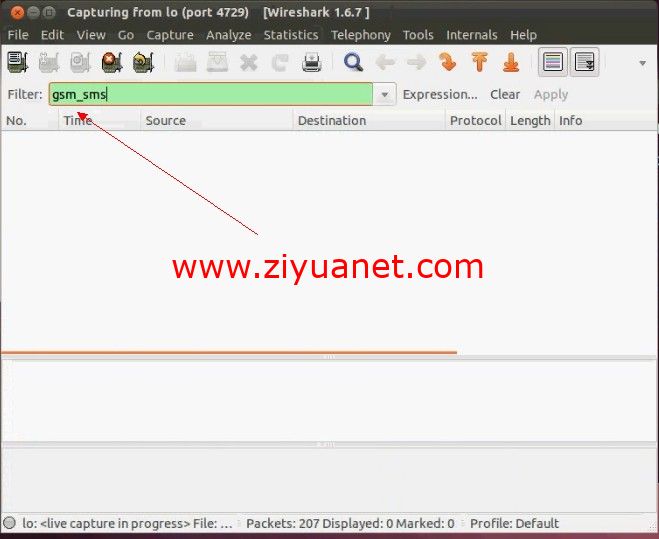
在filter输入 gsm_sms
接下来静静的等待吧。。。
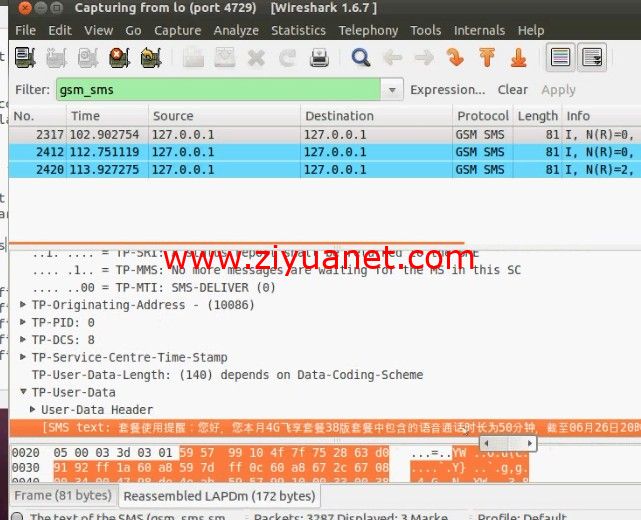
最后,自己玩去吧。。
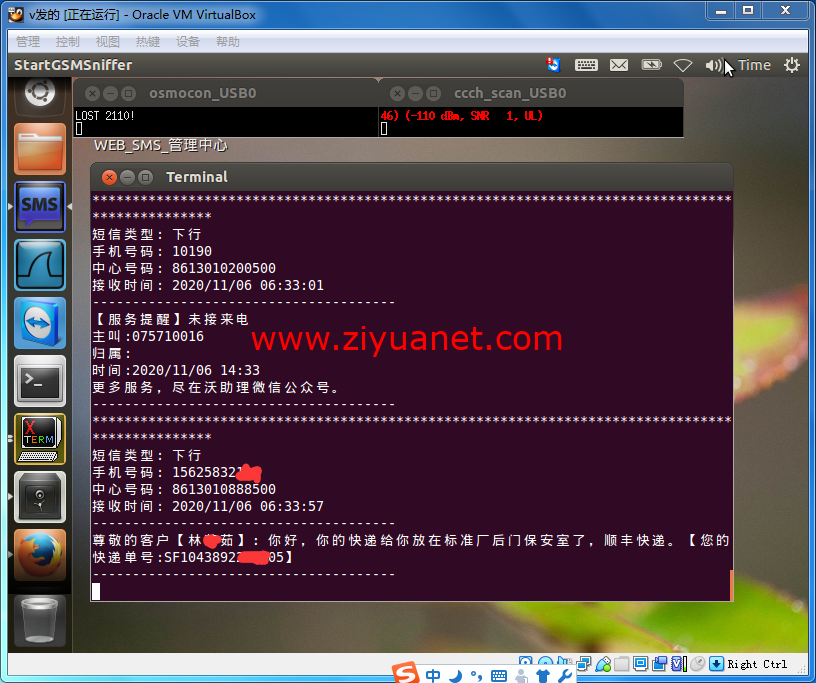
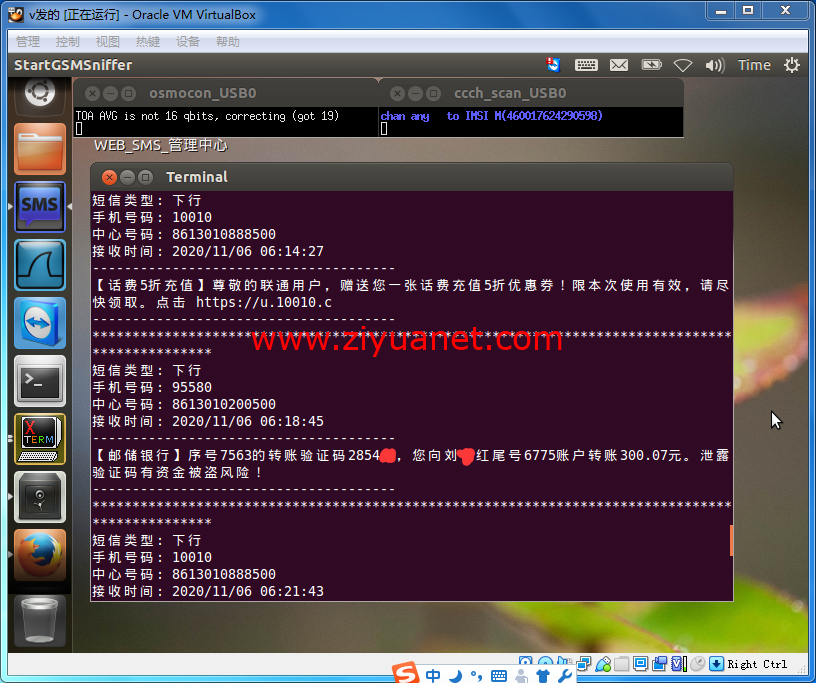
最后附上自已的嗅探到的短信内容,具体作用都懂,请大家不要拿去做坏事
以上就是资源外星人分享的手机GSM 2G网络嗅探设备组装之短信嗅探教程全部内容,希望对大家有所帮助!


